
|
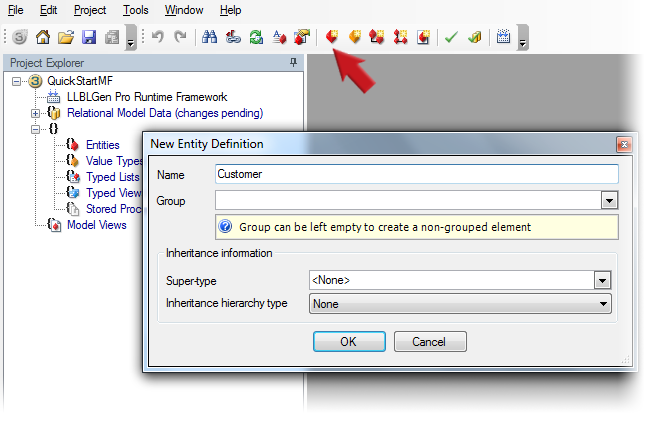
Click the New Entity button on the toolbar. Specify a name for the entity in the dialog and click OK.
|

|
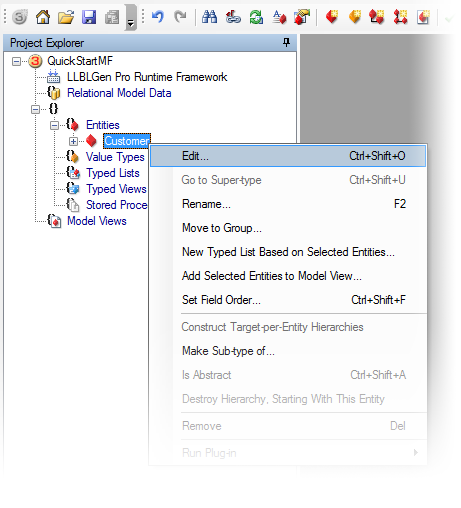
Right-click the entity you just created in
Project Explorer
and select Edit... from the context menu. The entity is opened in its Entity Editor.
|

|
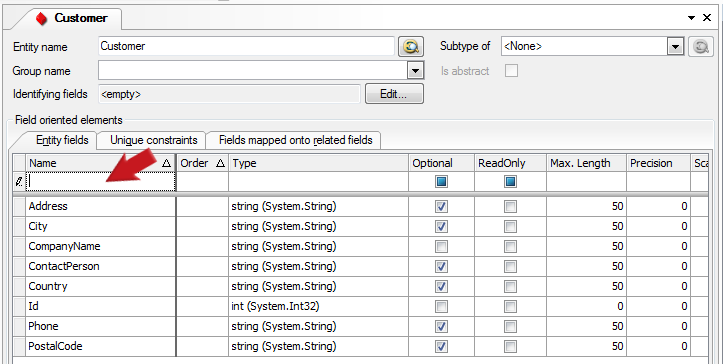
Click the top row in the grid on the
Fields tab and specify a
name and a type for the first field, e.g. 'Id' and 'int', using the TAB key to move between columns and complete pre-selections in the columns. Press TAB to move the cursor to the Optional
column and press cntrl-Enter to add the field.
|

|
Press cntrl-shift-F to add a new field, e.g. 'Name' and as type 'string'. Again press cntrl-Enter to add the field.
Repeat this a couple of times till you have enough fields in your entity.
|

|
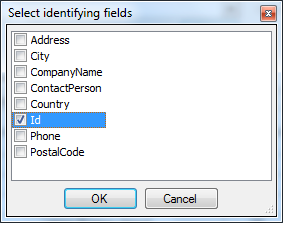
Click the Edit... button next to the Identifying Fields text box. In the dialog popping up select the Id field you created in step 3 to mark it as the Identifying Field (the 'pk').
|

|
Repeat these steps to create an entity 'Order' and its fields.
|

|
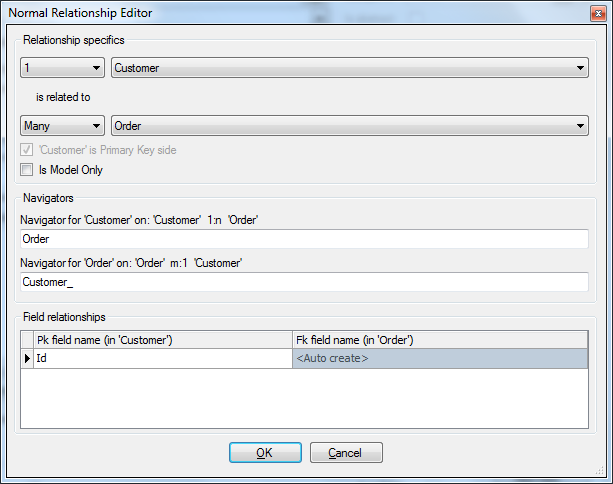
Right click the node Relationships of the customer entity in the Project explorer and select New normal relationship.
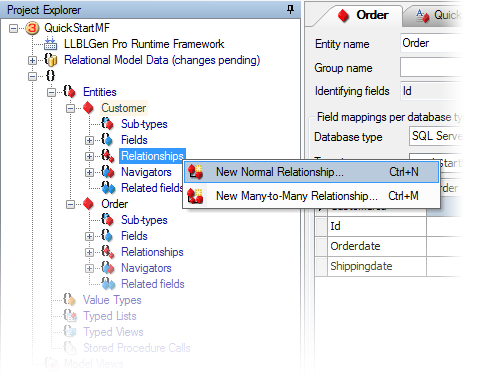
In the Relationship editor, you set define the relationship between Customer and Order and set Customer as the Primary Key side.
|
| |