The Model View Editor is the editor which allows you to alter any aspect of a model view definition: its entities and its documentation. You open a model view in its Model View Editor by selecting it in the Project Explorer and then right-clicking it and selecting 'Edit...', or by pressing cntrl-shift-O. The Model View Editor consists of two parts: the model view canvas and the docked documentation pane. These parts are described more in detail below.
The model view canvas of the Model View Editor has the following look:
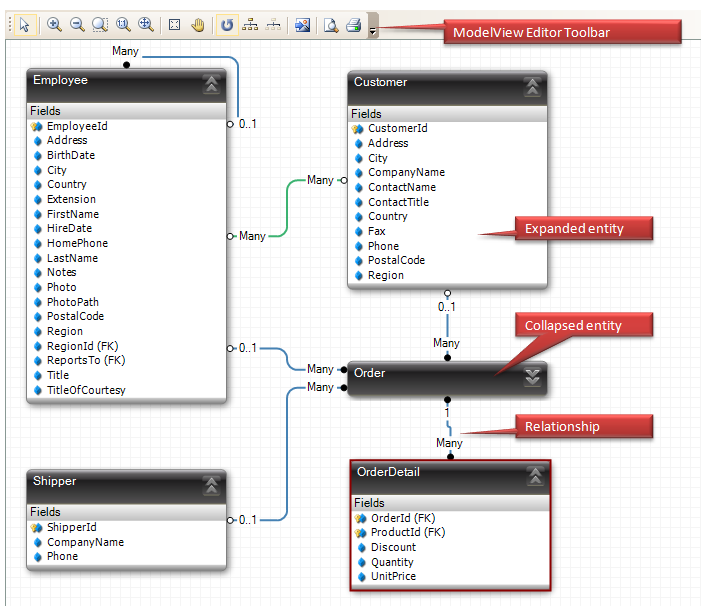
The Model View Canvas
The model view canvas shows the entities currently in the model view. All relationships and inheritance relationships between all entities in a model view are automatically part of the model view and displayed as well. By default the model view uses an incremental graph layout algorithm to layout the graph as efficient as possible: it tries to make dependencies float from left to right without a lot of cycles nor overlap / link crossings. Incremental layout can be switched off by clicking the 'Cycle' button in the toolbar. If that button is switched off, a full layout is used when the graph layout button is clicked in the toolbar.
Relationship types are specified using different colors: 1:1 relationships are displayed using the color MediumOrchid, 1:n / m:1 relationships are displayed using the color SteelBlue and m:n relationships are displayed using the color MediumSeaGreen. A model-only relationship is displayed with a dotted line, otherwise the line is sold. An inheritance edge is displayed using a yellow bold arrow, from subtype to supertype.
When you change the layout of the model view, it's preserved: when you re-open the model view, the layout of the model view as it was when the editor was closed is used to rebuild the model view graph in the model view editor. The layout is also persisted in a file: llblgenproproject.llblgenproj.layout located in the same folder as the project. This file is loaded when the project is loaded as well. To save the layout to a file, be sure to save the project.
Selecting an entity or relationship and right-clicking it brings up a context menu with functionality which works on the selected element. Selecting a relationship will also visualize it in the bottom pane, which is hidden by the splitter bar by default. The bottom pane also contains the mini-navigator, which shows the complete model graph and the actual visual area so you can quickly move to a different part of the graph.
Adding entities to the model view can be done using several different ways:
To the left of the model view editor, a documentation pane is docked, and slid to the side by default. Clicking the visual tab will slide open the documentation pane. The documentation pane is a small text area which allows you to specify additional information about the entities in the model view, the purpose of the group of entities in the model view and other information necessary to work with the entities in the model view. You can use this for example to store information obtained during an interview with a domain expert.