Reverse Engineering Element Editor
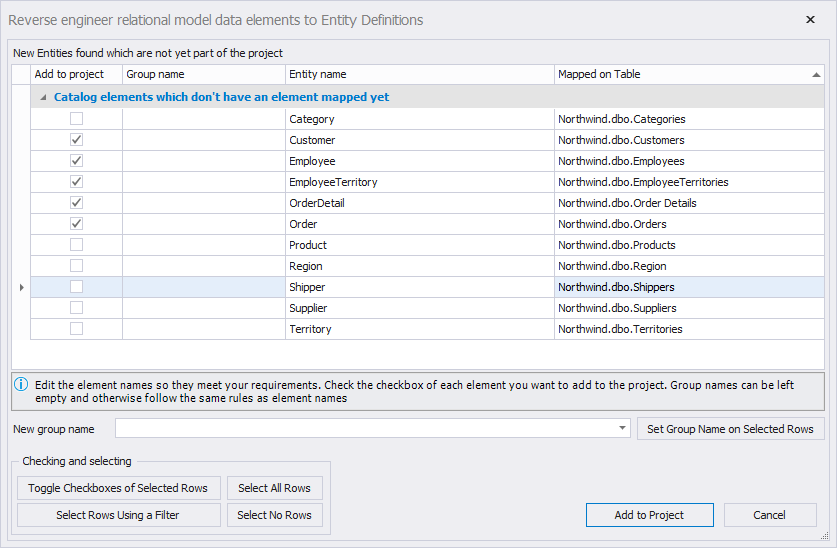
When you reverse engineer one or more elements from the Relational Model Data to model elements, e.g. entity definitions, using the Catalog Explorer, you'll do so by using the Reverse Engineering Element Editor. This editor is used to modify the names of the elements to create and to select which elements to add to the project. It consists of the following elements, described below.
To reverse engineer elements from Relational Model Data, right-click one or more elements or their containing element (e.g. a schema) in the Catalog Explorer and select the reverse engineering option you want to use from the context menu.

Reverse Engineering Element Editor
A row is considered selected when you click the row header of the grid. A row is considered checked when the checkbox of that row is checked. Selected and checked therefore mean different things in the context of the editor.
The editor contains a large grid which shows you the list of names for the model elements you want to create from the Relational Model Data elements and the Relational Model Data elements themselves. The first column consists of checkboxes: to add an element to the project, check the checkbox of the row of the element. You can use the tools at the bottom to quickly check/ uncheck rows: first select rows using either the grid's row headers, or the tools at the bottom, then click Toggle Checkboxes of Selected Rows to toggle the state of the checkboxes of the selected rows.
The grid groups the Relational Model Data elements which already have a model element mapped in the project as a different group as the Relational Model Data elements which don't yet have a model element mapped in the project. This makes it easier to avoid duplicate entities in the project.
The group name for the elements is either empty, or determined from the schema, depending on the Project Setting Set group name after schema name. To set the group name of one or more rows, you can either fill in the cell of the particular row by hand, or select / specify the group name after New group name, select one or more rows using the row headers of the grid or the tools at the bottom, and click Set Group Name on Selected Rows.
When at least one row is checked, the Add to Project button is enabled. When clicked, it will add the checked elements to the project.